

The Calibration page shows the calibration table of each module on your station. Each table holds a gain and an offset for each calibrated value. You can edit the values, save them to the module, or restore the factory values.
Accessing
-
Open a browser and go to
http://<hostname-or-IP>/of your station. Firmware 6.0 or later is needed. -
Select Calibration in the side menu.
The Calibration page is always in the menu. If no module has a calibration table, the page says so.
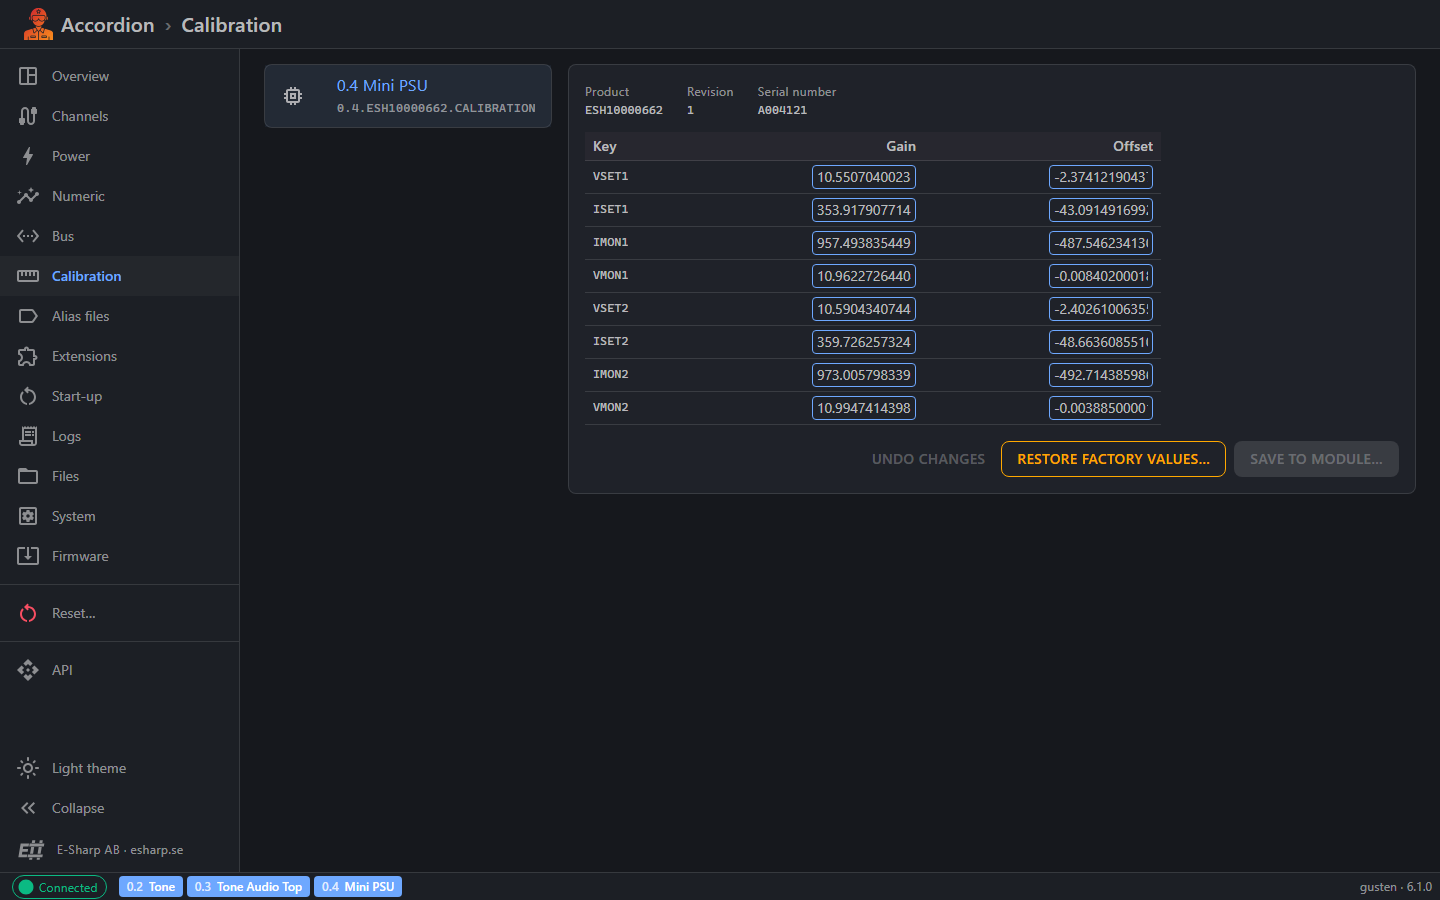
What the page shows
Module list
The list on the left shows every module that has a calibration table. Each entry shows the module's slot and name. The first module is selected when the page opens. Click a module to show its table.
Module information
Above the table, you see the module's Product, Revision and Serial number.
Calibration table
The table has one row per calibration key:
-
Key: the name of the calibrated value.
-
Gain: the gain for that key.
-
Offset: the offset for that key.
You cannot add or remove rows. The table always has the keys the module defines.
Edit values
-
Click a Gain or Offset cell and type a new value.
-
Changed cells are highlighted. Below the table, the page shows how many rows have changed.
-
You can use a comma or a point as the decimal separator.
-
If a value is not a number, the cell is marked and the page shows A gain or offset isn't a number. You cannot save until you fix it.
-
Click Undo changes to go back to the values the module holds.
-
If you select another module with unsaved changes, you are asked whether to discard them.
Save to the module
-
Click Save to module….
-
Read the dialog. It shows the product, serial number and number of changed rows.
-
Click Save.
The calibration is stored on the module, in its IDPROM memory. If the table does not fit there, it is stored in the module's CSV calibration file instead. After saving, the page reads the table back from the module.
Saved values take effect at once. The module's measurements and outputs change as soon as you save. The old values are kept only on this page until you leave it, so note them before you save if you may need them again.
Restore factory values
-
Click Restore factory values….
-
Click Restore to confirm.
The module goes back to its default calibration. Its stored table is overwritten, and its measurements change at once. The page then shows the restored values.
Tips
-
Each module is calibrated individually in production. Only change or restore its calibration when you know you need to, or when E-Sharp asks you to.
-
Check the serial number in the save dialog to make sure you are changing the right module.
-
Write down or copy the current values before you edit. You cannot get them back after you leave the page.
-
Use Undo changes if you are not sure about an edit. Nothing is written until you save.