

Three pages help you look after the station itself. The Files page lets you browse and manage the station's folders. The Logs page shows what the station has logged and what has been changed through the GUI and API. The System page controls the station's services, reboots it and sets its clock.
Accessing
-
In the side menu, click Files, Logs or System.
If another client holds the station (for example a running test), you can still read files, logs and status. You can't change files, services, reboot or set the clock until it lets go. A banner names who holds it.
Files
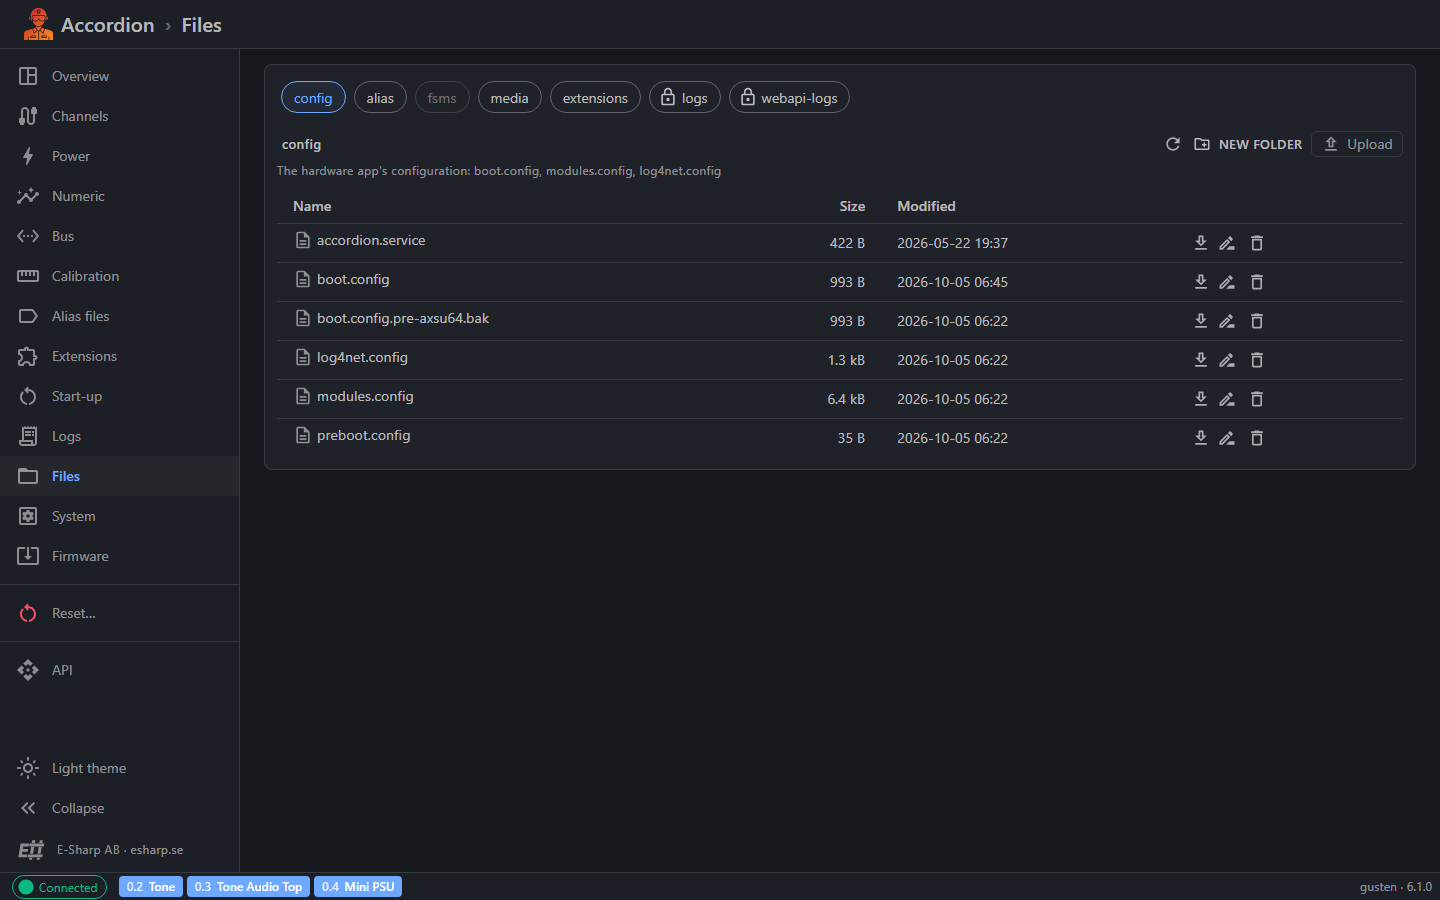
The Files page gives you access to a fixed set of folders on the station. You can't reach other parts of the station from here.
Folders
The folders are shown as chips at the top. Click one to open it. Hover over a chip to see what it holds. A folder that doesn't exist on this station is greyed out. A lock icon marks a read-only folder.
|
Folder |
What it holds |
Access |
|---|---|---|
|
|
The hardware app's configuration: boot.config, modules.config, log4net.config. |
Read and write |
|
|
Alias files. |
Read and write |
|
|
State machines. |
Read and write |
|
|
Captured images and sound. |
Read and write |
|
|
Extensions the hardware app loads. |
Read and write |
|
|
The hardware app's logs. |
Read-only |
|
|
The logs of the web service that runs this GUI, including the audit log. |
Read-only |
Browse
-
Click a folder name in the list to open it.
-
Use the path above the list to go back up. Click any part of the path to jump there.
-
Click the refresh button to read the folder again.
-
The list shows each item's Name, Size and Modified time. Folders come first.
Download a file
-
Click the download button on the file's row. The file is saved to your computer.
-
You can download from every folder, including the read-only ones.
Upload files
-
Open the folder you want to upload into.
-
Click Upload and choose one or more files. You can choose up to 50 files at a time.
-
If a file with the same name is already there, confirm that you want to replace it.
Each file can be up to 64 MB. Larger files are skipped with a warning.
Create, rename and delete
-
New folder: enter a name and click Create.
-
Rename: click the rename button on the row, enter the new name and click Rename. The item stays in the same folder.
-
Delete: click the bin on the row and confirm. Deleting a folder deletes everything in it. This can't be undone.
These buttons appear only in folders you can write to.
Deleted files can't be recovered. Download a copy first if you may need it again. Take care in the config folder: these files control how the station starts.
Logs
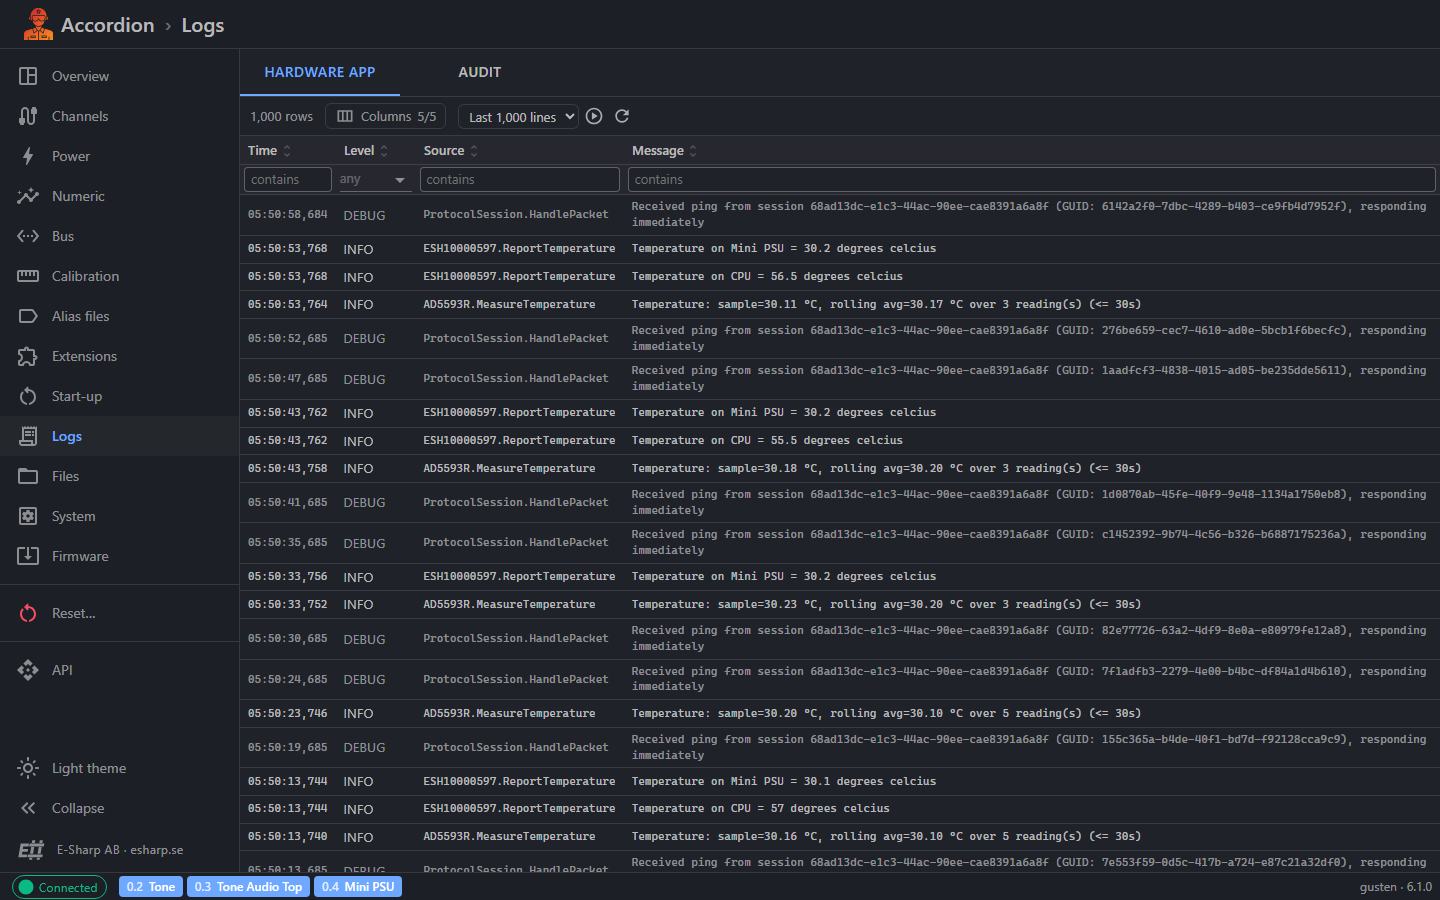
The Logs page shows the newest lines of two logs, on two tabs.
Hardware app tab
The hardware app's own log. Each line shows # (its position in the log), Time, Level, Source and Message. Errors and warnings are highlighted.
Audit tab
A record of every change made through the GUI and the API. Each line shows #, Time, Client, Method, Path, Status and Duration. Requests that failed are highlighted.
Work with the log
-
The newest lines are at the top.
-
Choose how many lines to fetch: Last 200 lines, Last 1,000 lines or Last 5,000 lines.
-
Click the play button to follow the log. It refreshes every 5 seconds. Click it again to stop.
-
Click the refresh button to read the log once.
-
Use the filter boxes under the column headers to narrow the list, for example to one level or one client. Filters work on the lines that were fetched.
-
Click a column header to sort by it.
System
The System page shows the station's services and clock, and lets you reboot the station.
Services
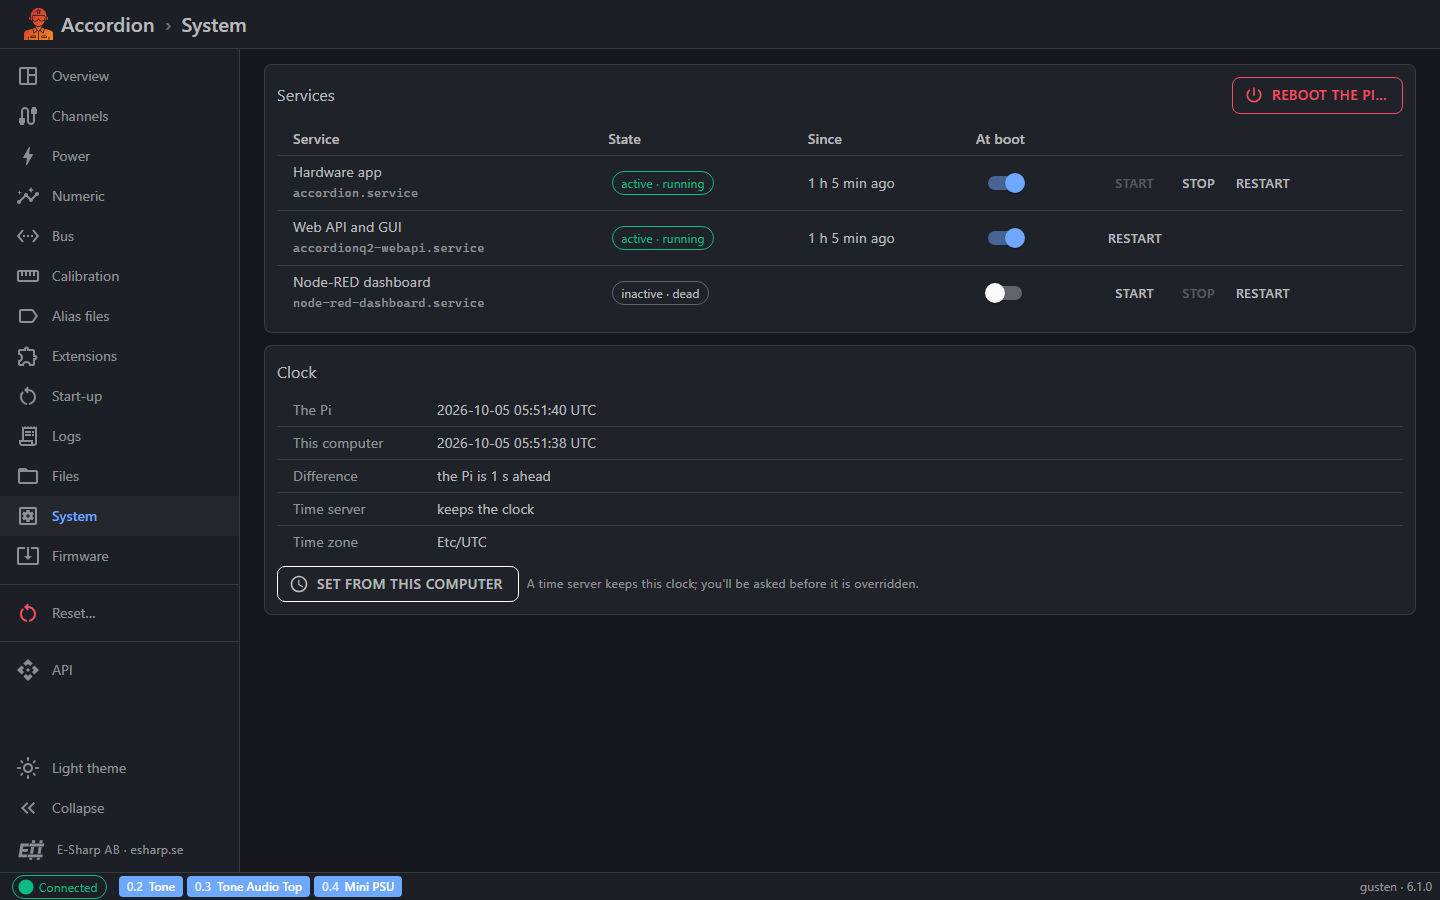
The list shows the station's services, such as the Hardware app, the Web API and GUI and the Node-RED dashboard.
|
Column |
What it shows |
|---|---|
|
Service |
The service's name and its system unit name. |
|
State |
For example active · running, or not installed. Green is running, red is failed. |
|
Since |
How long it has been in this state. Hover to see the exact time. |
|
At boot |
A switch, for services that allow it. On means the service starts when the station boots. |
|
Actions |
Start, Stop and Restart, where the service allows them. |
The list updates every few seconds. After an action, the page follows the service until its state settles.
-
Stop the hardware app: every client loses the station's channels until it is started again.
-
Restart the hardware app: every client loses the channels for some seconds, and the station's modules are set up again. Use this to apply changes you saved on the Start-up page.
-
Restart the Web API: this GUI and every client using it are gone for a few seconds. The page reconnects by itself.
You are asked to confirm before a service is started, stopped or restarted.
Reboot the station
-
Click Reboot the Pi….
-
Click Reboot to confirm.
Every client loses the station until it is back, after about a minute. A test running on it stops. The page reconnects when the station is back.
Clock
The clock section shows:
-
the station's time and your computer's time, both in UTC,
-
the Difference between them, highlighted when it is more than 2 seconds,
-
the Time server status: keeps the clock, enabled, not reached or off,
-
the station's Time zone.
To set the station's clock, click Set from this computer. The station gets your computer's current time.
If a time server keeps the station's clock, you are asked first. The time server is usually more accurate than your computer, and it may set the clock back again later. Click Set it anyway to go ahead.
Tips
-
Download the hardware app's full log from the
logsfolder on the Files page when you need more than 5,000 lines, or want to send it to support. -
Follow the hardware log while you restart the hardware app, to see it come up.
-
Use the Audit tab to find out who changed what, and when.
-
If the time server is off or not reached, set the clock from your computer so log times are right.
-
Restart the hardware app rather than rebooting when you only need to apply start-up changes. It is faster.